You may have heard the term ‘double digging’ used in gardening circles and wondered what it is and what it means. It’s a phrase that is less well known these days – not least of all because of the trend towards low-maintenance gardening that swept across the nation in the 90s and 00s. With flowerbeds and lawns replaced by astroturf, decking, slabs, pots and containers, the need to double-dig was largely removed from garden makeovers or the garden establishment process.
What is double-digging?
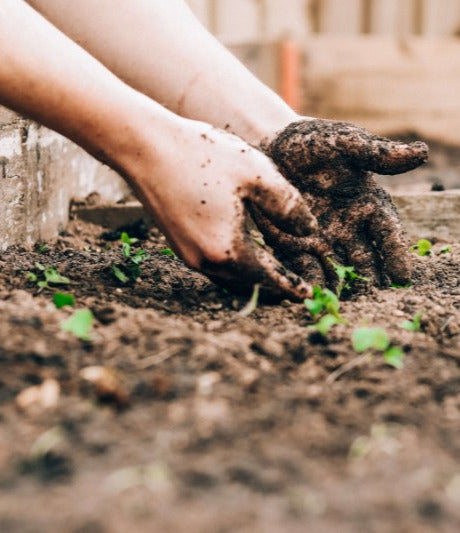
Double digging means that you dig down once into the soil, and then dig down again – in essence, it refers to digging down two spades in depth. It tends to be used when turning over soil to lay lawns or create beds and is a belief long held by many gardeners and horticulturalists as necessary to create the right conditions for growing. Whilst today its effectiveness may be questionable, it’s still a recommended method for preparing land for a range of different soil conditioners or garden projects.
Double digging and trenching (three spades depth) is about breaking more than just the top layer of soil as is often the case when turning over or creating a bed or lawned area. By digging down a spade’s depth, breaking the soil and then digging down a further spade’s depth, you’re allowing air, light and moisture to penetrate further into the ground. This creates deeper stronger roots and also allows you to add soil conditioners and hummus to help break down heavy clay soils or add nutrients to ground that has not been disturbed for some time.
Why should I double dig?
There are lots of reasons why double digging is still a valuable method of beginning work on a new bed or border or laying the groundwork for a new grassed area. Some of the key reasons are:
Compacted ground – Soil that has not been turned over for many years or has become compacted by heavy use or weather is far from ideal for growing plants and lawns. Double digging or even trenching compacted areas will help break up the soil, allowing any new planting or seeds to establish a good root system. If the soil is heavy with clay then the system of double digging will also allow you to add sand and hummus to the area, assisting with drainage and introducing nutrients to starved or scorched earth.
Poor quality, acidic or alkaline soils – If you’ve got a plot in an area with very poor soil or anything too acidic/alkaline, double digging will allow you to ensure the nutrient quality of the subsoil is improved, rather than simply breaking the surface and top dressing with better material. It can also help to neutralise soil and bring it back to a point that most plants will prefer. This cannot be achieved when only breaking the first level of the ground, as plants will quickly root through that and then begin to struggle as they seek to draw nutrients and moisture from further down.
Low fertility soils – Areas that have been left untouched or which suffer from poor fertility will benefit from being double dug so that plenty of additional material can be added to soil. Ground that previously sat under or around trees can often have some of the lowest fertility levels as all the nutrients will have been drawn out by the tree’s vast root system.
Breaking the soil to a good depth and introducing fresh, high-fertility soil, as well as allowing light and water to penetrate can rapidly generate a good growing medium in what was previously very poor soil.
New build homes – If you’re moving into a newly built house, double digging the ground will ensure all the rubble and construction detritus are removed. If you’re buying on a larger development, the chances are the build process has been going on for some time, through multiple seasons and all manner of weather conditions. After the houses are finished, the ground might look clear but bricks, cement, glass, wood and other potential contaminates might be hidden within the soil. You may therefore not realise how poor the land is until you begin trying to grow plants or establish a lawn. Double digging helps remove these, allows you to dig in soil conditioners and can also help to ease heavily compacted ground.
Benefits of double digging
If your garden is suffering from poor soil fertility/quality, compaction, or you’re bringing an area into service that has been dormant or surrounded by trees/hedges; a good dig over is going to provide numerous benefits to the soil. However, simply breaking the surface won’t offer as many benefits as going down two spades depth and introducing some fresh material will, and here’s why.
Improved roots – Double digging creates space for better soil structure further down, meaning that any plants you move into the ground, especially if you’ve potted them on and they go into the ground with a good root ball, can establish a better root system sooner. They will be able to access locked-in moisture lower down and if you’ve mixed in some fresh soil conditioner as part of the dig, they will be surrounded with a better mix of nutrients.
Improved Airflow – Plants and grass need a good mix of air, water, warmth and nutrients in order to thrive. Double digging helps introduce much needed air to the soil and the root system keeping it fresh and helping to avoid root damage from diseases and mildew.
Better Moisture & Drainage – Double digging promotes good drainage, stopping plants from becoming excessively water-logged or subject to drought. Looser soil, deeper down will allow water to flow down into the ground, sending roots down after it. Compacted ground forces water to sit on top of the soil meaning the roots then stay closer to the surface in order to access it.
Improved Soil Structure – The process of breaking the earth and adding soil improver will do wonders for the soil structure, especially in heavily compacted, clay soils. Lighter soil allows space for growth, healthier plants and plant or turf root systems to become established. The soil will also be easier to maintain than dense, packed soil.
How to double dig
It may sound as though you simply dig down two spades depths with double digging but in reality, the type of ground you may find yourself needing to double dig is probably not going to be very easy to work with. You’re therefore likely to end up with large clods of compacted earth on each shovel load and will need somewhere to put this in order to expose the layer beneath that will form the second spade full.
Subject to the amount of ground you’re needing to dig over, you may also need to work in sections to allow plenty of working space. And don’t forget, double digging is hard work, so you will need to approach it in phases.
12 steps to successful double digging
1. Mark out an area you need to double dig – we’d recommend squares or rectangles for ease
2. Identify the front of the area you need to dig over and start there
3. Dig down one spade’s depth, removing the clod and placing it in front of the hole you’ve just made
4. Now repeat that along the row moving from one side of your marked out area to the other
5. Now return to your starting point and dig down the second depth
6. Lift and remove this clod and place it in front of the first row you have just created (these two rows will be outside of your marked area)
7. Continue along the row again, lifting the second spade’s worth
8. Now work back across your marked sections in rows, repeating the process. Your second row will effectively fill the space made by your first row. Once you have completed the process you will be at the back of your marked off area
9. If you’re adding fresh soil, compost, conditioner or hummus, now’s the time. Fill your last trench with the relevant amount of new material, being careful to leave space for your original soil to sit on top
10. Once your first trench has fresh material, you’ll now reverse the digging process, lifting your earth from the row in front, breaking the lumps up with a garden fork or spade and mixing it with the fresh soil you’ve just added
11. Work back through the marked out area, breaking and mixing the earth from each row. You may choose to add further fresh material as you lift, break and replace each spade full or you can top dress the space once complete.
12. Once all the soil is lifted, broken and replaced, you will have quite an uneven surface. Ideally, this needs to be left, for as long as possible so that any remaining lumps have a chance to break down into the ground naturally, along with some rain and hopefully some sun rays to add warmth.
Once you’ve completed your double dig and the ground has had time to settle, you will be able to prepare it as required, tilling down to a fine even finish for a lawn or leaving it as is ready for planting.